Sunday, December 18, 2016

Lots of optimism this evening...


 photo IMG_7677.jpg


Well, today was a fun day and a sad day both...It was the birthday of one of Port Alsworth's loved ones we lost in the tragic airplane crash recently, and so there was that memory.  At church this morning I decided to join up with the McGees and set the burbot longline out in the lake.  We met up this afternoon and got the beast set in short order.  We didn't use the full length, but we can always lengthen it depending on how the first few days (or maybe week) goes.  Going to bring the video camera so that we can record the proceedings, as it was kind of fun to have the old rig back.  We used the same longline setup we used in Russian Mission (see past posts), this time with only 15 hooks soaking, but of course we didn't have to deal with the current here in the lake, so things were even easier.  Can't wait to check tomorrow...  Also, I saw tracks in the snow, and got word that another fox was back last night by the rabbit hutch of the neighbors.  Needless to say, I put in another set out in front of the house, and so there is much excitement in the air for morning to come so we can check on all things 'set'.  Looking forward to the coming day with gratitude and anticipation - but trying to shut out any expectation, as that is usually not wise or as fruitful.  I will say, though that there was blood involved today when setting the longline, and for those of you that have followed along, we all know what that implies...we shall see.  ;)

Thursday, December 1, 2016

He did it!!

Well, that student I mentioned in the last post about the crazy fox day - has done it!!  His first fox is now a thing of the past.  I will not write his name here, as he is still one of my students, but may he trap throughout a long and happy life.  :)
 photo IMG_1471 2.jpg

We started by heading out to an area where he had some sets and snares out, and the fox sign was plentiful for sure - he was already in the right place.  It didn't take long and I spotted a nice cluster of spruce where we could employ one of my favorite snow sets I created while in Pilot Station - the "step-up Snowhole".  It uses an upslope to the trapper's advantage, just as a step-down-set employed by trappers everywhere, uses a down slope to get canines to commit.  Below is the finished set from a couple different angles, with some explanation:

We used an 'edge' where there was an open corridor of snow that separated a stand of spruce and some head high brush.  The fox were using this corridor as a through-way, the tracks in the snow told us.  :)  We 'roughed it up' (think 'catch circle') and made the set on a bank, using some dead spruce placed in a V as our backing.  These spruce chunks can come in handy, as the branches sticking out at all angles really help keep the canines from coming in the back or from angles you don't want them coming in from.  Just make sure to bust off anything that hinders their approach from the trap side.
 photo Bankset3.jpg

Chip in a nice level bed for the trap and bed it solid, center of pan five inches out.  The trick is to place the trap and the shelf it sits on, the right distance from the hole so that the fox cannot investigate from below it (downslope) without committing, and cannot investigate without stepping up onto the pan in order to satisfy his curiosity. 
 photo Bankset.jpg

After just a few words of advice and some quick demos, I turned everything over to my student and he made the set himself.  He did it right, as two days later, he took his first fox out of this set.  :)
 photo Bankset2.jpg

 photo IMG_1470 2.jpg

Congrats. Man!!! Hope to catch a lot more with you in the future!!!

Tuesday, November 22, 2016

Four fox in 12 hours...with one trap (and a bullet)...


 photo IMG_7430.jpg
Mom, and the boys, and baby sister (hanging in the baby carrier inside the coat) with an early morning catch. :)

Little did I know how this one was going to turn out.   So this Fall, and Winter, just as last year, we had been seeing fox around the house, and had been seeing them walk by the school during class, etc...so it didn't strike me as odd.  After heading home one day to lunch and seeing one walk right up to me, I figured it was time.  That same day, Sarah saw one approach the boys where they were playing just beyond the front yard, and she mentioned it was a little weird.  Sounds good to me, I figured.  I had been trying to refrain from catching the ones around the house, but when they act like they aren't wild anymore, well...I didn't need any encouragement anyway, but if they're offering...

I made a set right at dark, last night (the 21rst).  The set, though, was right out in fron tof the house, just across the drive - we're talking like maybe 25-30 feet from the front step.  This morning, on the way to work, as I shut the door, I heard a faint "tink-tink-tink-clink".   Hah!  I thought...Bingo!  Walked over with a headlamp, and, sure enough, the area looked awfully dark (catch circle)..and then the eyes lit up, and I walked to work.  With a smile.  I waited for daylight, which at this time of year, here in Southwest Alaska, is not until about 9:45.  Then I brought it up with the kids in my class, and we quickly decided to go get the fox out of the trap.  We filmed the dispatch, and then I quickly went back to work and got through the rest of the morning classes.

 photo Screen Shot 2016-12-05 at 10.51.29 AM.jpg

However, when I went home for lunch, I spotted a fox going around the back of the teacher housing, and making his way over to our house.  I ran behind building s when I could, dodging his sight until I was back at my front door, where I grabbed the .22 Mag and some bullets.  However - I grabbed some .22 LR rounds.  I did this knowingly, because the rifle uses shorts, longs, and Magnums.  However, I did not know what was about to happen.   went back out the front door, thinking the fox would head for the catch circle - which he probably could smell for a long ways.  Sure enough, he did.  I saw him break for it behind some spruce and use d my chance to get in position, pushing the safety and waiting for him to stop when he got to the set, which I was covering with my front bead.  He stopped, and I squeezed.  'Click!'.  Nothing.  I couldn't believe it.  I shucked that shell, dug another one out of my pocket, and put it in the chamber.  Pulled up, with him looking at me this time, about 20 feet away.  'Click!'...WHAT!?!!....Racked the bolt, catching the shell, and put it BACK IN, and squeezed. 'Click!'  My heart about stopped at that one.  That was enough for the fox, and he bolted out of sight off into the trees.  I was bummed beyond belief.  However, I wasn;t so bummed I couldn't skip lunch, and instead put in a remake with the tra from the morning.  I had a feeling the fox would be back, and quickly.  I even brought the shells, with their firing pin marks, back to class with me to share the tale, and 'warned' the class that we may catch another.

It wasn't long, and I got a text from Sarah...she said that there were not one, but TWO fox out by the sandbox in our backyard, milling around. Apparently the boys saw them during lunch. Excitedly, I asked her not to go outside or let the boys out..if only they would go around to the front we'd have a second one. :) Sure enough, about 2 minutes later, she texted again. We had one. Hah!! I rounded up one of my students, and we headed for the house.  However, upon getting to the front yard..we noticed a fox streaking across the back yard, once again by the sandbox.  We quickly went inside, and I grabbed the .22 Magnum again.  Not liking the angles on him from the back porch (remember, we were in the teacher housing area, with other houses nearby) and hoping this time the gun would go off, we made our way out the front door - past the other fox snarling and jumping in the trap - which my student thought was simply spectacular - and the following ensued (Click link to view in Dropbox):

View clip on DropBox HERE

So, with that fox from the backyard down (rifle worked as usual, in case you didn't watch the vid at the link), we were now in possession of two, and had a third in the trap out front.  We walked over to the catch circle with the just-shot-fox in hand (which was a HUGE male, beautifully colored by the way - pics coming when he is processed.  I took a few pics, and we dispatched the third, and placed him in the freezer.  This was turning out to be a great day.  The catch circle was SMOKIN' HOT!!!!
 photo IMG_0473_1.jpg

It was that knowledge that made it just impossible for me to not remake the set again.  I HAD to do it.  So after school, I remade the set before dinner.  All the while it had been snowing off and on, but the set was down to the bare ground and leaves from all the..um..activity...

 photo IMG_7446.jpg

We enjoyed dinner and were getting the boys ready for bed when our neighbor knocked on the door and said he heard a snarling coming from the area of the set.  (It was already dark).  I went out, and together he and I dispatched the fourth fox of the day.  Three in the same trap in 12 hours is now my personal record.  At least one of them was caught only a little over an hour after I set it.  Wowza.  No pics of this last one actually came out, as it was too dark.

 Now I am left to wonder if I could have done it in less time if only this all didn't go down on a work day.  :P  :)   I'll give it a break for a bit now - but only for a bit - and then I'm gonna remake that sucker again...we might not be done yet with the "front yard set"...Next up, though, is to help one of my students catch their first fox...

Tuesday, November 15, 2016

One in a million?... :)

Well...the chicken raider is dead.  Here in bush Alaska, you often get the chance to see wildlife in your 'backyard', that much is certain.  Sometimes, however, the wildlife you do see is not the kind you'd like to.  Case in point:  some neighbors (well, maybe 200+ yards away neighbors) mentioned that they were having some trouble with foxes and weasels harassing their chickens.  I was very happy to say that my boys and I would be glad to rectify that problem, and so we set out to do it...

Upon arriving and talking with the neighbors about the situation, we learned that this would be a pretty favorable setup.  The chicken coop bordered the brush and tundra at the edge of their yard, and the offending weasel had been seen pacing around and around the coop looking for entry on multiple occasions.  Just what we like to hear. :)  Warren, Abram, and I found a great, level spot to place the box, and I set the trap and allowed them to place it in the front of the box.  We added the bait - raw chicken of course (giblets) - to the back of the box and secured the lid.  We chose not to use any lure in this case because I felt that the use of any type of long distance call I might normally use (Lenon's weasel lure, or, say, some gusto) could potentially call in more predators than were already causing problems.  That, and we already had (or the chickens had) a captive audience.  I figured, let the chickens stay under the radar for as long as is possible, if you ask me.  The neghbors also thought this was a good approach, as they had already shot one fox and mentioned possibly taking care of some others, though it seemed they didn't want to if it wasn't necessary.

At any rate, me and the boys left the trap there, and we went back to check the next day, only to find nothing.  They were a little bummed, but of course I had the chance to once again explain why this is trapping, not catching, and that if there was some fur in the trap every time we went to check it, things just wouldn't be the same.  The next check, however, was a different story.  After finally getting the boys' attention away from the chickens, they came over to the box, and opened it - and the celebration began...and while they were jumping and hollering it occurred to me - this weasel looked 'different'.  Quite different.  My first reaction, caught in the video we took, was to say He's....like....BLUE!.."  And so he was...

 photo Screen Shot 2016-12-14 at 8.03.59 PM.png
I've never seen anything like him. My first thought was that he was coated in something. But what is laying around a house or garage or whatever, and is that color?...Also, how did he do such an even job of "coating" himself, if in fact that was the case?...
The tale remains to be told, as when we take him out of the freezer to skin him I plan to wash a bit of him in dishsoap and get the skinny for sure. At any rate, though, the boys were CRAZED, as usual, and it was better to just enjoy the moment than wonder why. :)

 photo IMG_7362.jpg

 photo IMG_7368.jpg

Wednesday, August 31, 2016

Opportunity Found! ...in the currents of Currant Creek (Bull Down!)


Well, these pages have outlined a lot of moose hunts...but I never had a moose hunt go quite as perfectly as this Fall's hunt did.  The closest it has ever come to this year's tale was the 2013 bull I took while hunting with Sarah's dad in 7-mile slough, (click here - and that post will open in another window) but even that one was after weeks of hunting HARD through, ice, snow, heavy winds and waves on the Yukon, etc...so that one 'smooth' trip that year really didn't play out the same way, after all.  This year's trip was the first outing for moose since we got here (after taking last year off from hunting them), and technically, it was just a scouting trip. That would change, however...

Our day started off in the morning around 8:30 AM last Saturday - A little later than I am used to setting out during moose season.  In fact, as Cam and I pulled out of the bay, my mind was on spotting a bear on shore as we traveled up to the river we planned to hunt, as I had already kind of written off the trip as a scouting adventure, that we could maybe spruce up a bit with a black bear encounter...seeing as they are traveling the lake shores in search of the sockeye salmon that are gathering up in crazy numbers around the creek and river mouths these days. We never did see any bears, however, and we soon found ourselves at the mouth of the river.

We figured we’d head up as far as we could go, and mark important stuff on the GPS - sandbars that would make good potential camps, meadows with good sign, etc. - that way we’d have a plan of action for September. We spent much of the morning heading up river, hiking in to meadows we scouted on google earth and trying to learn the braids and channels as we went. When we finally grounded out (hard), we turned around, and began the trip back down. We quickly learned that the shoe on the jet was bent, and after removing a lot of rocks, and getting underway again, deduced that we had ground the impeller a bit, which was causing some lost water compression and reduced throttle. Oh well, we figured at the time, no biggie. We continued to stop at likely spots and explore the area.  The morning went much like this.  Pulling off on sandbars, heading into meadows to look for sign - and some general exploring of this incredibly scenic area.

 photo IMG_6579.jpg

After coming back downriver about 8 miles, we rounded a sharp bend and my eye caught on the partially blocked body of a moose, a ways down river, maybe 125-150 yards away. As the bull turned his head and began moving along the water’s edge, I noticed he was still fully in velvet, and the paddles looked black as coal in the light. Even though that made them blend in with the shadows of the trees behind him, I instantly could see that this was not a bull I’d pass up. My safety was off before I even motioned to my partner, who was driving. We closed the gap as he tried to find the bull using my hand signals, and once he locked on it, I saw recognition come over his face, and he set to work getting us over to the beach. As the waves of our wake began hitting the sandbar and the boat itself, the noise caught the bull’s attention, and his head swiveled quickly to focus on the sound. It was too late, though, as I had bailed and was already squeezing the trigger as he seemed to realize he was looking up river at something that shouldn’t be there. At the crack of the rifle, the bull pulled that maneuver we all love to see – he reared up onto his hind legs, hunching his back and pointing both front legs straight out at the ground. Just like that, he was off into the willows. We tied up and followed his fresh tracks through a tunnel of brush, but saw no blood for about 20 yards. Then, we looked to our right and there, just on the other side of some willows, (like as in about 6 or 7 yards away, larger than life) he was stumbling away. Unable to get a shot other than the Texas heart shot variety from where we were standing, we both split up and fanned out. When the bull emerged from the other side and started across the sandbar, I couldn’t see him, but Cam did, and put the coup de grace on him. When we walked up and watched his last kicks, I realized I was staring at the boat (up and just right of the bull in the pic below), and couldn’t help but smile at the pack we wouldn’t have to endure this time around: photo Screen Shot 2016-09-13 at 6.46.36 AM.png

Cam, just as the moose hunting's "What just happened?!" set in... :)
 photo IMG_6595.jpg

The beautiful color that lung blood brings:
 photo IMG_6599.jpg

Cam and the mighty bull.
 photo IMG_6601.jpg

The most scenic bull moose headshot I've ever been in (at least until a few minutes later, anyway)
 photo IMG_6604.jpg

A 30-pound backstrap!!  The original organic, harvested the right way - doing it yourself.
 photo IMG_6617_1.jpg

Some cool color variation in his velvet.  Normal?  Don't know, never shot a bull in velvet before this one...
 photo IMG_6619.jpg

Epic horn shot, part 1...wowza....
 photo IMG_6635.jpg

And some more epic-ness...
 photo IMG_6630.jpg

You have to love it when you're so close to the boat that you don't even bother strapping the meat onto the frame pack...
 photo IMG_6642.jpg

and the "Back at the boat" shot...  :)
 photo IMG_6661.jpg

And this next photo just speaks to me.  Right down to the bugs caught in the frame. It is precisely images like this that keep a hunter awake the night before, get him out of bed early, keep him out long after dark, and burn into his memory forever.  This just might be my favorite moose hunting picture yet.  What a day...
 photo IMG_6654.jpg

Some more cool velvet shots...
 photo IMG_6666.jpg

 photo IMG_6667.jpg

Home safe and sound. :)
 photo IMG_6671.jpg

Now for the processing...so we can get out there and get a sheep....

Thursday, May 26, 2016

The Hackle Ant!!

 photo aU2Ke.jpeg

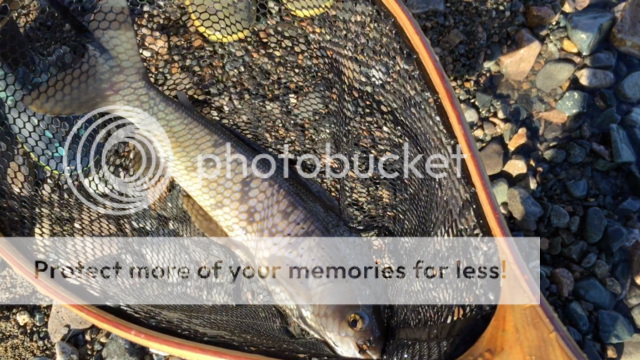
While things are just heating up here on Lake Clark as far as the fishing is concerned, it has suddenly taken an upswing.  Not only have we been seeing salmonfly hatches during the midday, but things are warming up enough where terrestrials now seem to be out in full swing.  Enter, the Hackle Ant.  This pattern is one I found online, and upon tying it up, figured it was a pretty good imitation of a bee, or an ant, or some other chunky crawly critter for that matter, all at the same time.  Seemed like a keeper.  And based on our first outing fishing it....It sure is.


Like most of the patterns I enjoy tying, this one is fast, simple...and catches fish like a champ, which is always good.

The ingredients are "simple":

 photo FdnFp.jpeg

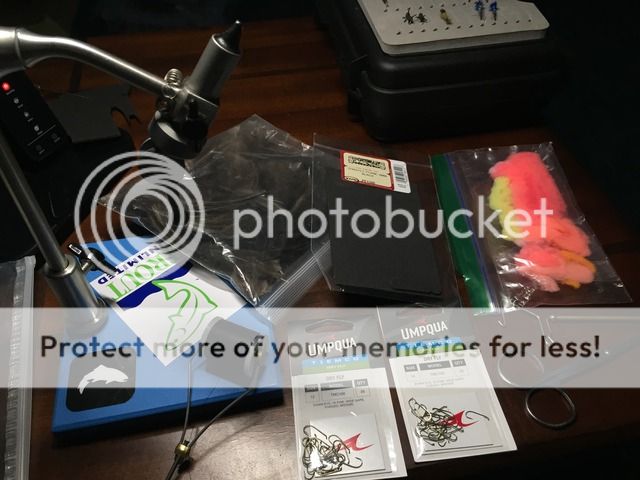
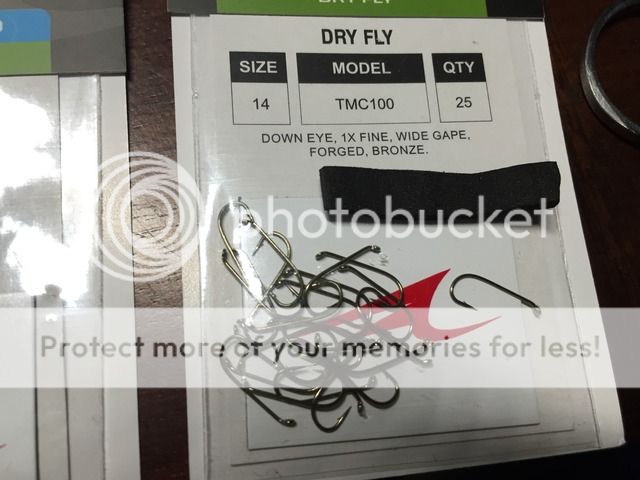
- Hooks of your size and brand choice (Here I used tiemco dry fly hooks in 12 and 14)
- Veevus #6 thread, Black
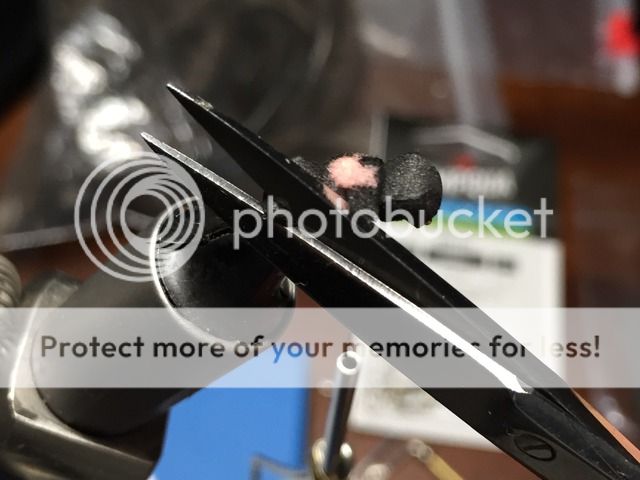
- Some 2mm Black foam (Here I used Sportsman's Warehouse brand)
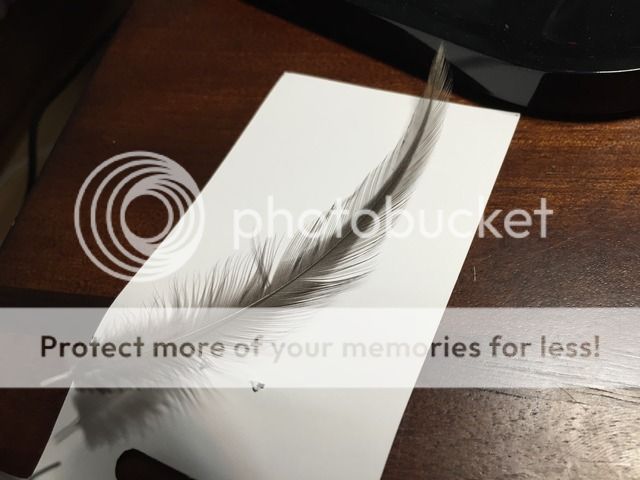
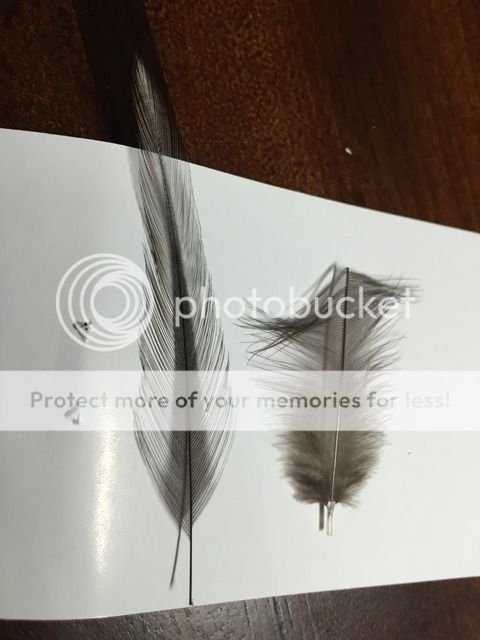
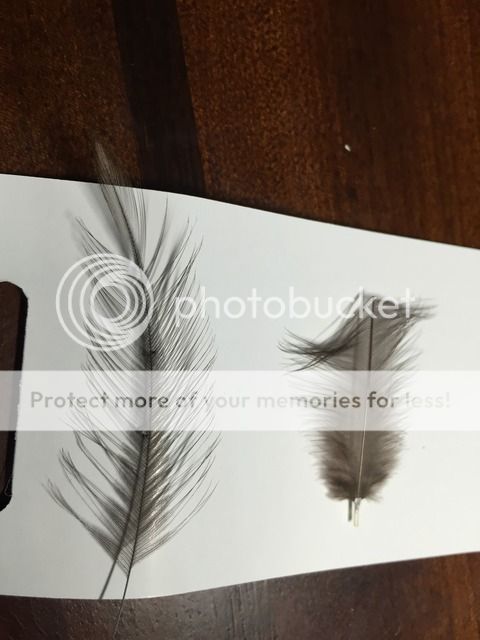
- Black or very dark brown hackle feathers of your choice
- Loon Hard Head or other similar fixative
- Some Glo Yarn, if you wish, for placing an indicator on the ant's back. This is not necessary of course.

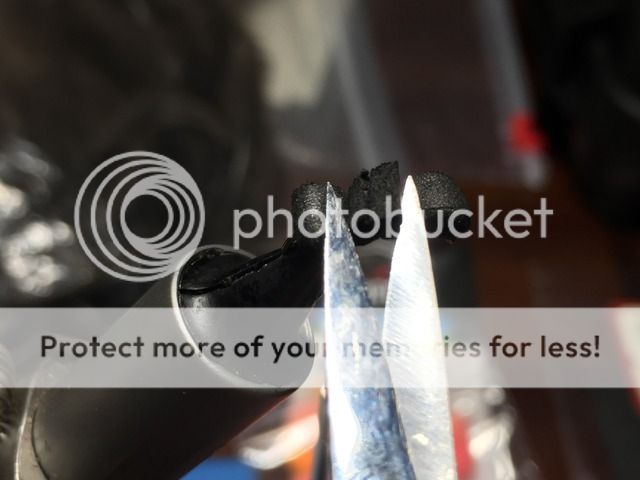
Once you get the ingredients together, place your hook in the vise and cut a narrow strip of foam that is about 2.5 to 3 times the length of the hook shank - roughly the width of whatever size ant you wish to make :) 
 photo ks5yk.jpeg

Next, build yourself a thin, even base of thread running from just behind the eye to just past the barb of the hook.  Dab some Hard head or super glue or Zap a Gap or whatever you use onto this thread, and immediately secure the foam to the hook with a bunch of wraps.  As for placement, I like to allow one-third of the foam to stick out both in front of the eye and behind the bend of the hook; so I am basically securing the middle one-third of the foam's total length at this step. The adhesive prevents the fly from spinning on the hook, both now, when you are tying, and later, when the fish are trying to tear it apart.  Once your wraps are on, things should look kind of like this:

 photo cHRru.jpeg

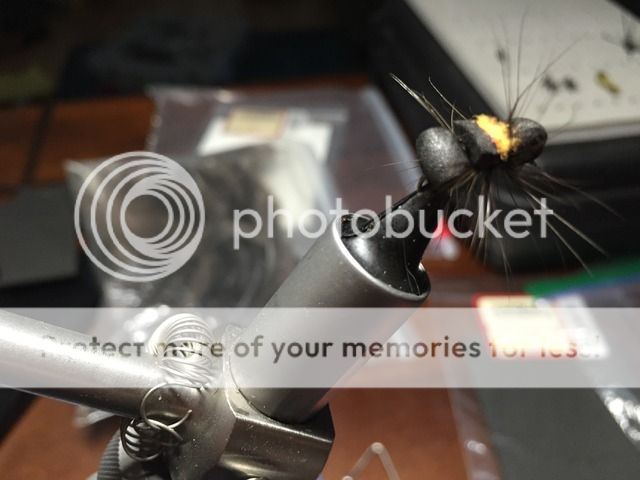
I like to finish that last step with my thread toward the rear of the hook right where the last thread wraps secure the foam to the hook (in picture above). I then bend the rearmost end of foam back on top of itself, forming the ant abdomen. The end of the foam should come a little past the center point of the secured portion. I then bind in the abdomen with some good tight thread wraps. Next, do the same with the front end of the foam. Bend it back, forming the head of the ant. Secure it with more tight thread wraps, and what you end up with is an appropriately sized abdomen and head, with two tag ends of foam meeting right in the middle, creating what will be the thorax:

 photo HpJhk.jpeg

From here, trim the tag ends so that they are flush with each other, and also so that they have a lower profile, not sticking up much beyond what the head and abdomen do when viewed from the side...

 photo r2PVN.jpeg

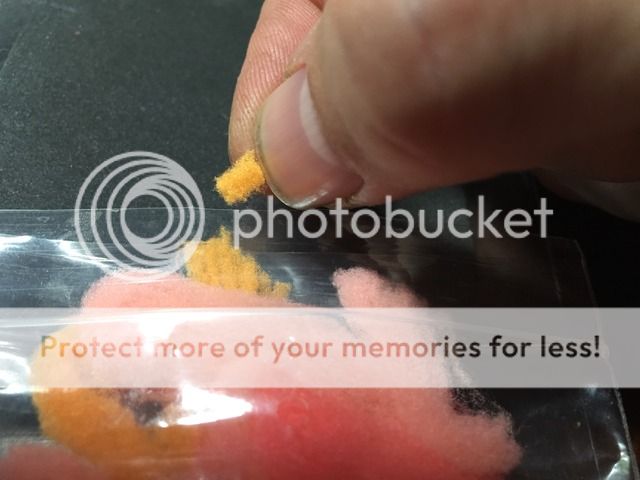
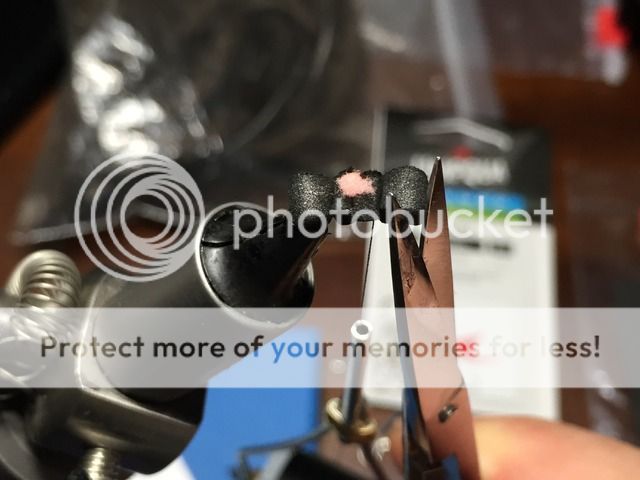
Once they are trimmed, this is where you can add the indicator, if interested.  Cut an appropriately sized small chunk of glo yarn:
 photo tSQud.jpeg

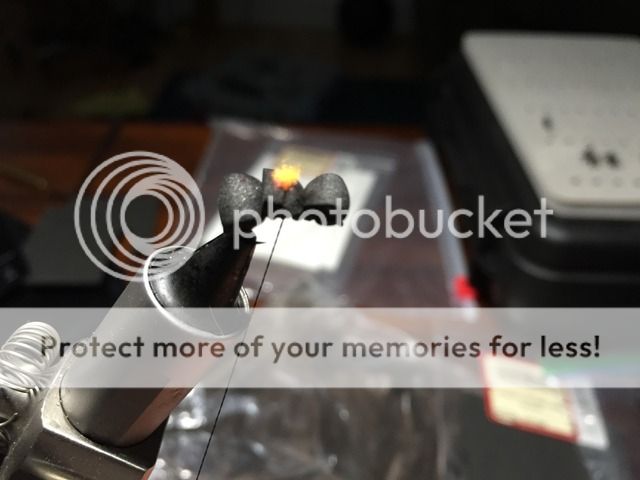
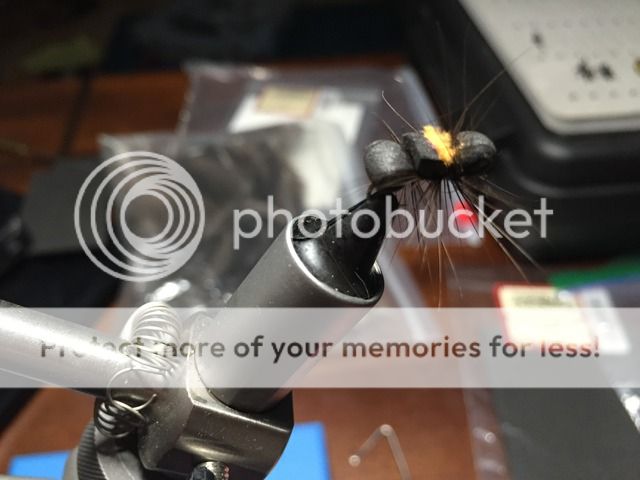
You can then place this over the trimmed tag ends, and secure it by running a thread wrap right through the two tag ends, which will pull the yarn down in between them a bit. Give this a few more tight wraps, all the while being careful to not cinch the yarn tuft down in so far it becomes useless...

 photo k0Fbr.jpeg

 photo 2ve4t.jpeg

Next, get your thread over to the wraps just behind the head to set up the hackle legs. Then select a hackle feather, trim it and prep it accordingly:

 photo miLDu.jpeg

 photo N5uYg.jpeg

 photo IGrqf.jpeg

Then tie in the base of the stem behind the head and secure it with 2 or 3 wraps of thread.

 photo kbFv0.jpeg

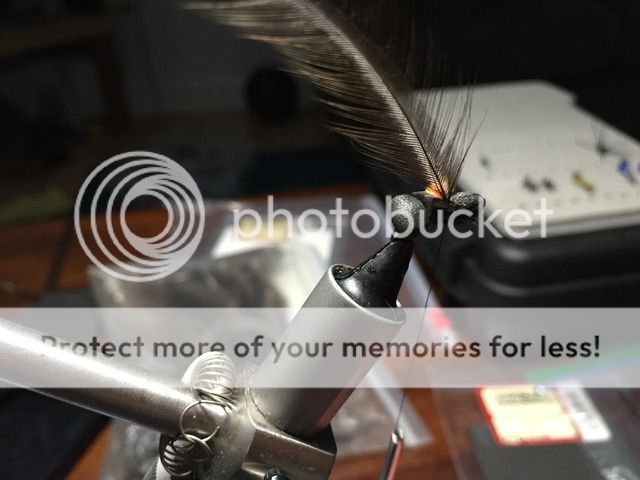
Wrap the hackle two turns around just behind the head, then cinch it in with a couple more wraps of thread. As you come around the body on the second wrap, swing the hackle feather under the body to prepare for two wraps just in front of the abdomen as well, also securing this with your thread when done.  Hackle pliers may be helpful here, depending on your fingers and the size of the ant you are making...

 photo J6mQL.jpeg

 photo mckxt.jpeg

 photo Anmqg.jpeg

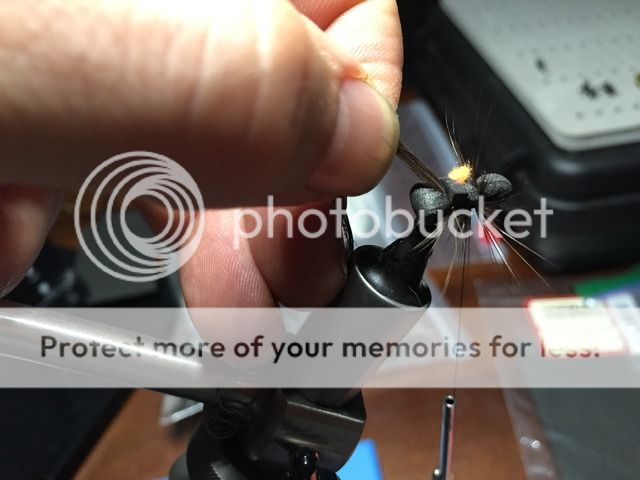
Now, these are some super long legs, that we need to trim.  In addition, we can trim just the corners of the head and abdomen to round them off a bit and give them shape.

 photo JjliX.jpeg

 photo 9MQZO.jpeg

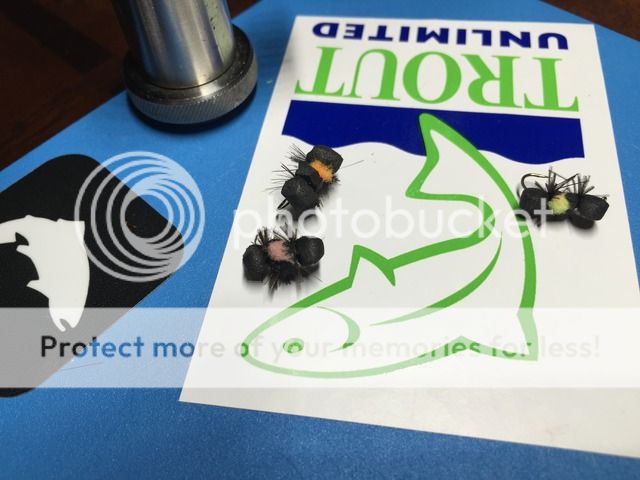
When done, you should have an Ant/Bee/Beetle/crawly critter...presenting, the Hackle Ant!

 photo aU2Ke.jpeg

Does it work you ask?...time and time again... ;) :)

 photo Screen Shot 2016-05-24 at 2.29.48 PM.png

 photo hackleantcrop.png